Thursday 30 June 2016

It's been too long...

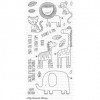
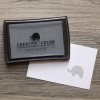
Hi crafty friends, today I have a bright and cheerful card for you which combines products from several different companies. The star of the show is without doubt the adorable elephant from My Favorite Things' Sweet Safari stamp set, though. I colored him up for the 30 Day Coloring Challenge a while ago and was just happy how much life I could breath into this critter by using grey markers only.


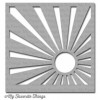
Since I wanted him to really stand out, I decided to go with a monochromatic background that would make him pop. I am using my stencils not often enough, and in this case, the Sun Ray Stencil by My Favorite Things came in handy. I only wanted the rays, not the sun, but the elephant covered up the circle so that wasn't a problem. I used two different Distress Inks – the light one covered the entire background, and with the darker one I sponged in the rays.


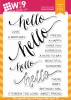
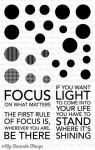
I wanted the elephant to stand on a grassy ground but didn't want any more color, so I left it white and I love the contrast this plain piece of paper provides. I also traced the outline of the sentiment from Wplus9 with a white gel pen for additional contrast and it looks almost like a sticker.


Thank you for stopping by today! Have a great day!

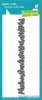
There are many alternatives to the grassy border die you can pick from, for example the Grassy Trio Creative Cut, Grassy Edges Dienamic, or Grassy Field Dienamic.

Wednesday 29 June 2016

Positively Pink!

Hi - Kate is taking a break this week so you're stuck with me again.   I needed to make something fun to brighten my life as its all been a bit difficult around here since the brexit vote so here's my effort to cheer myself up!


I've used one of the new paper pads we got in store yesterday as my inspiration - Summer Party by Echo Park cos I do have a thing for flamingos!   I used the oval flop die from MFT to create my base but removed the "flop" bit as I just wanted the interesting shaped front to my card.  I used the die again to create the dark pink mat - cutting it twice to make a complete oval.   The flamingo die is also from MFT and is coloured with 3 shades of markers.  I think often we are in the mindset of colouring stamps and cutting dies from plain card but you can colour your die cuts too for a much more realistic look.   The sentiment is from the co-ordinating stamp set called Tickled Pink.

Hope it's cheered you all up too and don't worry Kate will be back next week!

Tara


Tuesday 28 June 2016

Inside Out Secret....shhhh.


Hey! How are you?

I have a confession.
I've been keeping a secret from you all. It's one of the best products (and probably the least expensive) in the whole store.
I felt I should come clean and show you.
You're none the wiser?
Yup, You'd be forgiven for passing them by. They are Pop-up Trio creative cuts dies!
and they're £3.50. I wouldn't normally say the price, but really- they're brilliant!
Here's how.
Lay them out on a piece of thin (it needs to be thin so it's easier to bend) cardstock. You can see the red lines; they don't come like that, but I've just followed the central score lines from the die on the reverse using a permanent pen so I can line up the centre with the fold line. Add some washi and then pass through your die cutting machine.

Once cut, this is what they look like.

Then you need to carefully push the fold from the reverse so they stand up like this.

 The great thing about these little dies, is you can cut as many or as few and position them exactly. I have some expensive pop-up dies but they only cut where they're designed to.
Then you simply decorate. I've done it straightforwardly but you could go to town. I've used the cute Unicorns and Rainbows set
Such an easy and effective idea. Once you've finished the inside part, add a 'jacket' of cardstock or paper to hide the folds and decorate the front too! 
There are a reasonable amount in stock - but I wouldn't hang around now the secret is out!

Hope you have a lovely unicorn-y and rainbow-y kinda day!


Monday 27 June 2016

It's Graduation Time!!

Hi there and happy Monday to you :)

For todays project I've taken inspiration from my fellow DT girl, Keren, who's the queen of illusions with acetate!! I love how it creates the suggestion of movement which was just what I needed for this box card....


It's proud Mum and Dad time this week as our daughter graduates from University and I wanted to make something a bit more than a regular card so I thought I'd try a box card using the Avery Elle Hats Off stamp set and dies. I followed a template I found on the web, there are quite a few designs and sizes out there if you type in box card, and I made the basic shape of this one with white card. I decorated the panels with black card on the outsides and then squared paper from MFT's Off the Grid Paper pad on the flaps. 


The box has three card inserts which I've used to attach the rows of arms and the mortar boards on their acetate strips..


To decorate the flaps and back panel I inked the edges of the gridded paper and used stamps from various sets which I've linked below

In case you're not familiar with these types of cards, they do fold flat for placing in an envelope and posting albeit with some extra protection for the journey. This card, however, will not be going in the post so I allowed a few of the hats to poke out of the folded footprint and I'll have to custom make an envelope for it...


I've added the same gridded paper to the underside of the flaps so we can add our message to the card too :) I'm really pleased with how it turned out and will definitely be making this type of card again :)


Please note: The "So Very Proud of You" sentiment stamp I've used on the back panel is from a set in my stash and not available in store.

Thanks for stopping by :)
Jenny x


Sunday 26 June 2016

Making the Most of Patterned Papers

I thought I'd share a trick for mixing patterned papers with stamped and coloured images today as I know lots of people struggle with how to use their papers on a card.  There are a couple of tricks I use when working with papers - firstly I try to take the colours I use to colour my image from the paper I selected to use, and then I add a "barrier"  piece of plain card to mount my image on to give it space and make it pop.   I've done a couple of examples here using the same image in two different colour ways so you can see what I mean.


I actually made these cards for members of DT who had birthdays this week but they should have opened them by now so I can share them.   I wanted to use Enda With A Cupcake On Top as I love the oversized cupcake (and she has a big bum just like me!) so I selected two different papers from the new Party Time paper pad from Echo Park and set out to colour them.  It's probably not a surprise that I went for the teal paper, so for my second card I forced myself to pick colours out of my comfort zone - the balloons give you lots of scope for picking colours for the image.

Once the images were coloured and cut out out I chose a circle die and cut circles from white and black card stock - this is my "barrier piece".  If you put your image directly onto the patterned paper it would be lost but by mounting her onto a contrasting plain paper first you give the image space to breathe. 

The paper pad has a couple of papers in it that have happy birthday written on them so I decided to use those for my sentiment with another trick I like to use with patterned paper - cutting it into strips of different thickness.  This adds more interest than a thick single strip as you still get some of the base colour mixed in.

Hope those are useful tips are you have a go at using papers on your projects.


NEWS FROM THE STORE:
  • We received a big restock order from MFT yesterday which will be live in store later today or tomorrow.
  • We currently have deliveries pending from Concord & 9th, SugarPea Designs and a massive restock order from Lawn Fawn but they are stuck in customs clearance hell at the moment.  I am working to clear them and hope we can get them released within a couple of days.
  • We have another two massive restock orders from Altenew in transit - hopefully that will be here by the end of the week (customs willing).  Not all the oos items will be in this order as some items are still oos at their end.  We order every couple of weeks at the moment so we will get everything back as as soon as we can but their stock flies out so fast we are unlikely to ever have "everything" in stock at the same time.  Sorry, but there is nothing we can do about that - the best advice is "grab it while you can"
  • We have an order in with Neat and Tangled for a new release and restocks which should ship this week.
  • We have an order in for the stunning new release from Stamping Bella and are just waiting for it to ship.


Saturday 25 June 2016

Add Glitter to Outline Stamps

Hello crafty friends! I’m on mission. Actually, I’m on two missions. First: glitter all the things! And second: get Tara from Seven Hills Crafts to stock my favorite Elizabeth Craft Designs Glitter again and that means getting YOU guys to let her know you want it so she knows if it makes sense to order it. I’m going to share a few glitter cards over the next few weeks to make you crave glitter, too! (And if you start craving it, leave a comment here on this post that you want this fantastic stuff to come back to the store :) )

Today, I’m going to show you how to add glitter to outline images. I know! Usually, you wouldn’t, but there’s a super duper easy technique (so I easy I’m hesitant to call it a technique, but the effect is too cool not to share).


Told ya. The effect you can get when you coat Glossy Accents with glitter is amazing. If you are generous with the glue, it even dries slightly raised, so it will look even better when it is sparkly all way around. Also, be generous with your glitter as you are dumping it on the project. You need to make sure it’s covered all around, and you can easily funnel the excess glitter back into the jar so there’s no waste.


As with all glitter, you will get it on other places than just the glue. That’s just something you need to accept, but you can reduce the glitter mess considerably with some very easy steps:

  • Set up your workspace so that everything that you don’t need is out of reach.
  • Grab a sheet of scrap paper to dump glitter on. After you funneled the glitter back, fold the paper and throw it away.
  • Use static cleaning/dryer sheets to wipe off excess glitter from your work surface. Works like a charm and no mess!

You might still look a little sparkly after using glitter, but believe me: it’s by FAR not as messy as you might think if you just prepare a bit.


I am so pleased about how these My Favorite Things flowers turned out and how clean and simple the entire design it. Since I wanted the glitter to take center stage, I made sure to keep the rest of the card basically completely white as to not to distract. That’s not to say you can’t have other elements on your cards together with glitter, and I’ll show you different examples of that throughout the next weeks.


If you have sticky embossing powder (that turns sticky when heated) you can use that to stamp sentiments or more intricate shapes, and then pour glitter on that sticky powder (Versamark itself is not sticky enough).

Just don’t forget that you need to wait a while until the glitter has dried before you can finish the card. I usually err on the side of caution and give my project at least 30 minutes, if not an hour. After that time, I use a pen or brush to knock against the backside of the panel to shake off excess glitter (remember that scrap sheet of paper and those dryer sheets!), then use a brush to wipe off whatever still sticks where it ain’t supposed to go. Once the glue is dry, you can rub (gently) over the glittered areas without trouble.


Thank you for stopping by today! I hope you got inspired! And if you like glitter and want to use these gorgeous colors from Elizabeth Craft Designs, let Tara know so she knows to stock them (non-US peeps only, please) - leave a comment on this blog post! In an upcoming project I’ll show you why I prefer this glitter to other brands, so stay tuned!

Oh, and if you want to see how I created this card, as usual hop on over to my blog (link in sidebar) for a video tutorial. Cheers!