Tuesday 31 May 2016

Embossing Challenge Winners

It seems you are all big fans of embossing as a technique as we had a record number of entrants in our challenge this month which meant it was even harder than normal to pick our winners.  We had a wide spread of entrants with both heat and dry embossing and you all really rocked it but as strong they all were we had to select some winners.


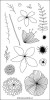
Our overall winner this month was Ashwini with the beautiful bold and bright take on white heat embossing with some great water colouring using Altenew's Golden Garden stamps.  Congrats Ashwini - message the store to get your £15 winners code.


Our runners up this month, in no particular order were Sarah, Lucie and Gemma.  We loved the allover golden embossing on Sarah's etched flowers, the bold dry embossing on Lucie's paired with the stars and sentiment in black to make it all pop, and fun water colour and white embossed design on Gemma's ice-cream card.


 Congrats ladies - do take your winners badge for your blogs!


If you didn't win this time, don't despair - we have a brand new challenge for June starting tomorrow so pop back tomorrow afternoon to find out what new challenge we have in store!

Reverse Whatsitsname!


Hey! Hope you're having a good day!
I was lucky enough to have a day in the beautiful Lake District. Being surrounded by gorgeous scenery and gardens made me think of this stamp set and I wanted to try a little reverse dimension.
I've used the Lawn Fawn 'Gleeful Gardens' set- which is just the cutest


 I wanted to start with the largest image at the top and then add the elements getting smaller behind it.This picture gives you an idea of what I mean.
To be honest, once I'd made it, I wished I'd just created two circular frames and added the elements after. Instead I just cut out around the images which was less precise. I added 3D foam behind each layer.
I've tried googling and asking what this technique is called. I thought it might be pyramage; but it isn't. Reverse decoupage is about the best I could come up with, so if any of you know, please enlighten me!

Sweet and simple from me this week. Do give this one a go- it's an easy way to make scenes without really trying!

See you next week!


Monday 30 May 2016

Smooth Blending

Hi there :)

Yay for another Bank Holiday and I hope the weather is good where you are... we're cracking on towards summer so it ought to be!! ;)

I have an interactive card for you today featuring Lawn Fawn's So Smooth stamp set.... I just couldn't resist these cute images in the recent release. I have seen a couple of shaker style cards with this blender jug but I've gone for a pull tab on my card to mix up some smoothie fun....


and when the mixing is done....


The front panel is just masking, stamping and colouring along with cutting out the inside of the jug... the workings are all behind and just involves some forward planning and a strip of card you have applied colour to, in this case I used markers, to mimic the fruit blending in the jug.
Here's a short and silent video to show the blender in action, I was ably assisted by my daughter whilst I did the shaky camera work ...


It's all trial and error when making these 'pull tab' interactive cards, but they really are quite simple which is what I love about them. The strip of coloured card slips up and down inside a channel of foam tape, you need to make sure you have enough space above and below the images so the coloured card doesn't show when fully up or down. I always try my ideas out on thin cheap card first when attempting this style of card.


Thanks for stopping by and I hope you have a great Bank Holiday Monday if you're in the UK and if your not, have a fab Monday anyhow :)

Jenny x


Sunday 29 May 2016

All Things Avery Elle

Sorry for the late post - we were out at a gig last night and early mornings are not good after a late night these days!  I've been having lots of fun this week with the new release from Avery Elle and mixing some of the sets with older sets to create a great scene.  I have 3 projects to share as a result so bear with me...


First up is a fun birthday card using the Tough Guy stamp and matching die - the die is particularly brilliant on this set as it cuts out the "inner" bit around his arms which would be tricky with fussy cutting!  I paired it with one of the fun panels from Reverse Confetti's Party Time pack and their double banner die.  The guy was coloured with zig clean color markers.   The quick card panels are really good for making quick cards as you don't need much more to make them pop.

Next I wanted to play with the Japanese set, Konichiwa, as I met my husband on a Japanese course so we like all this Japanese!


I love the versatility of this little set - you can change her expression and the little single flowers mean you can dress up the kimono as I did here - just use a post-it to make sure some of the flowers go over the edge for added realism in the fabric.  As I added the chopsticks to her hair I fussy cut her and popped her up on foam squares over a simple background with the cherry blossom stem stamped onto coloured card and shaded with pencils.  This time I coloured her with the Kuretake alcohol markers.

Finally I went to town on what was going to be a card but I like how it came out so am going to make two more to make a triptych scene for the bathroom and frame them.  Stamps are little works of art in their own right so do think beyond cards!


I really loved the coral reef die in the new release and the fun characters in that bites and thought it would be fun to hide one amongst the coral so that was my starting point for this make.  I die cut the coral and painted them with my gansai tambi (we are waiting for the standard sets to come back in stock at the UK distributor and will then have them for you to go with the starry colours) and added some of the golds over the top for coral like shimmer (really hard to photograph - sorry!)

I used the paints to watercolour a sea like background and left it to dry whilst I stamped and coloured the fish from that bites, the whale from whale wishes and the shark from Hello Chum onto more card and coloured with the clean colour markers again before fussy cutting.  It was then just a case of arranging them onto the sea and stamping a few of the little fish in and around the coral directly onto the background with pigment ink.


NEWS FROM THE STORE

We are not expecting many new arrivals this week with the bank holiday but we will have the first of our two restock deliveries from Altenew later today or tomorrow which includes the first of our large ink pad sets deliveries - not all colours are currently available but we will get them as soon as we can. They are working hard to increase their stock and staff to ship orders so hope we can get things more quickly in the coming months.   Edited Sunday night.   Having just checked off our Altenew stock it is apparent that we are missing 2 boxes and we don't have the one with the invoices in to check it off!  DHL will not deliver now until late on Tuesday so stock will be replenished Tuesday night or Wednesday morning.


Saturday 28 May 2016

Easy Watercolor Background for Heat Embossing

Hi crafty friends! Now that I have finally got a grasp on how to blend colors without it resulting in a muddy mess, I  thought I'd take it one step further and try it with "real" watercolors instead of just markers. I am still hesitant, because there is little control with colors on a wet brush, but I am quite happy about how this turned out.


I started by using my anti-static tool on my card and then heat embossing a Paper Smooches sentiment and a leaf image in the center of my card. The heat embossing will resist watercolors, and I find it easier to do this first so I won't have to wait for my watercolors to dry later on.

I applied some clean water with a large, flat brush over the surface of my card. By wetting the area you want to color, you achieve two things: 1 – the colors blend more easily on a wet surface, and 2 – you can actually control the flow of the color since it will mostly stay in the wet area. Going in the direction of the color wheel ensured that the colors would blend nicely and not result in unpleasant mixes.

I added a few spritzes with my Mini Mister of Perfect Pearl water to add some shine and voila – a clean and simple watercolor card all done.

Thanks for stopping by today!

Friday 27 May 2016

Get your Rocks off!

Hi everybody,

Jill here, and this week, I am rocking out!


Using the amazing new Rock and Paws set from Mama Elephant.


I love it when a company releases something so different, so fun, and so me!  And this definitely ticks all those boxes...dogs with guitars, rocking out...what more could you possibly ask for?  I, literally, could not wait to ink these bad boys up!


I started by inking up my background to create what is meant to be a spotlight on a stage, blending yellows towards the centre and greys and blacks around the outer edges.  I then stamped out these cool guys from the Rock and Paws set, coloured with my Copics, and fussy-cut.  The Rock and Paws set is from Mama Elephant's latest release, and if you haven't already checked it out - you really must.  I mean come on...one of the cute puppies even has Kiss make-up on haha.  So, so brilliant!


I gave my keyboard player a red sparkly keyboard and matching glasses, and my guitarist got a matching red sparkly guitar using some Sakura sparkle pens.  I added a couple of pieces of grey and black card to the bottom to create a stage, cut the whole panel out using Lawn Fawn's Cross Stitched Rectangles, and built up my little doggy band on top!  I stamped out and coloured a couple of speakers to add to my scene (coz all good gigs need a decent sound system), and added the little 'Rock On' sentiment from the same set.  I completed my sentiment, 'Rock on, it's your birthday', using Lawn Fawn's 'Year Six' set (I use this one tiny stamp set so many times to finish of a sentiment - worth the few pound just for that alone let alone the uber cute shellfish in there!).  I added  a slick of Glossy Accents to my keyboard players glasses and my singer's microphone, and finished my card off with a scattering of sparkles.


I really hope you like it, and as always, everything I used is linked below.

See you next week, and until then...rock on!

Jillx

Rock and Paws  Small Cross Stitched Rectangle Lawn CutsYear Six

Thursday 26 May 2016

Make Your Sentiment 'Pop' With A White Pen


Hi there everyone! Lydia here with you this morning. Here in North Wales the weather is pretty dismal, so if the weather where you are is the same I have a card that will hopefully brighten your day a little.

Concord & 9th 'Wildflower' set reminds me of more tropical florals so I decided to stamp like a jumgle-y type scene to frame my sentiment.


I stamped and masked my flowers to get the clusters that I wanted. I then coloured them with Copics and added a little shading to the larger flowers using pencils.


For the sentiment I used Concord & 9th 'Beautiful You' dies cut from black card. Where the sentiment overlapped the image I took a white gel pen and went around the letters covering over the image, this helps the sentiment 'pop' more and not get lost in the busy image.


I hope you feel a little brighter after this and try using a white gel pen to get your sentiment to stand out from the background.

Hugs Lydia x


Wednesday 25 May 2016

Incredible birthday


Hello.
My card for today uses stamps and dies from Concord & 9th and is inspired by the new Hugs card die.
I don't have that die,but I like the gate fold style and the sentiment across the front.


Here it is closed so you can see the front.
I started by making my background using distress inks.
I flicked water onto the ink then lifted the colour with a paper towel.
I then stamped the flowers from the flourish stamp set in black archival ink.


Once the ink was dry i went over the black with a black wink of stella pen.


For the inside I stamped birthday using both the upper case and lower case sophisticated script stamps.
Then I added some of the flourish stamps is light colours.


To finish i i added some sequins.

Wonderful Words DieFlourishWink of Stella Brush - Black

Sophisticated Script Uppercasesophisticated script stamp

Thanks for looking.